Dahlia tubers
Dahlia tubers shop is open for the 2026 growing season.
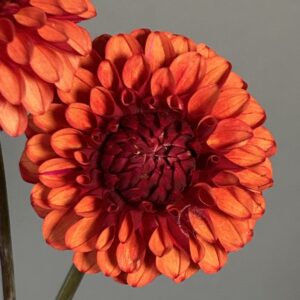
Dahlias are the undisputed queens of the late summer garden—bold, prolific, and utterly impossible to resist.
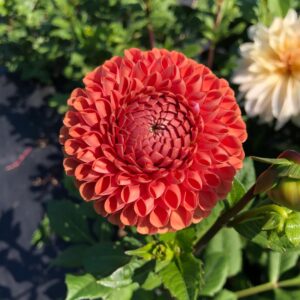
I’ve built a collection here on my farm of varieties that truly perform: stunning colors, incredible petal formations, and stems that last. From dramatic café au lait tones to electric oranges, tight pompons to wild cactus forms—each dahlia brings its own personality to arrangements.
All tubers are lovingly grown and hand-harvested at my flower farm.


Planting Notes
How to Grow Dahlias – A Farmer-Florist’s Guide
I’ve learned most of what I know about dahlias by actually growing them—making mistakes, figuring out what works, and doing it all over again the next season. This guide covers the essentials for growing dahlias specifically for cut flowers. If you want to dive deeper into dahlia cultivation, the American Dahlia Society (www.dahlia.org) is an incredible resource.
Planting Essentials
TIMING IS EVERYTHING
Wait until your soil has warmed to at least 65°F before planting tubers. Cold, wet soil is dahlia enemy #1—it leads to rot. A good rule of thumb: plant dahlias when you’d plant tomatoes.
WHAT TO DO:
Stake early. Even compact varieties benefit from support. Trust me, it’s way easier to stake before they’re flopping over.
Watch for slugs and snails. These jerks love tender dahlia shoots. Put out bait, especially if you have mulch or low vegetation nearby.
Water wisely. Once plants are about a foot tall, give them supplemental water during dry spells. Tailor this to your climate—some need more, some less.
Stay vigilant. Check regularly for pests and fungus. Catch problems early before they spiral.
WHAT NOT TO DO:
Don’t use fertilized potting soil (like Miracle-Gro mixes). It can burn tubers. Use a soilless mix of peat, perlite, and vermiculite instead.
Don’t water dormant tubers. Wait until you see green growth emerge. Tubers don’t drink—feeder roots do. Watering too early = rot.
Avoid high-nitrogen fertilizers. Too much nitrogen gives you giant, floppy plants with fewer flowers and weaker tubers.
Don’t plant in heavy clay. Dahlias hate it. Amend your soil or plant in raised beds.
Pinching for More Blooms
When plants are 12-18 inches tall, pinch out the central growing tip (the top set of leaves). This forces the plant to send out multiple lateral shoots instead of one central stalk. The result? More stems, more flowers, bushier plants. It feels counterintuitive to cut off perfectly good growth, but trust the process. You’ll thank yourself later.
Cutting for the Vase
Growing dahlias for cutting requires a slightly different approach than growing for garden display. Here’s what I’ve learned.
Disbudding for Bigger Blooms
Remove the two smaller side buds next to the main flower bud when it’s about ½ inch across. This channels all the plant’s energy into that central bloom, giving you a larger, showier flower. This is especially helpful for waterlily forms, whose side buds sometimes shoot up above the main flower and look awkward.
When to Harvest
Harvest stage depends on the dahlia form. Vase life averages 4-7 days, and timing your cuts right maximizes it.
Many-petaled varieties (Ball, Formal Decorative, Informal Decorative, Cactus, Stellar):
Wait until the first 4 rows of outer petals have lifted and peeled back from the center.
Few-petaled varieties (Collarette, Anemone, Orchid):
These can be cut at the full bud stage—they’ll open in the vase. Or cut a long stem with multiple flowers at different stages for a longer show.
Medium-petaled varieties (Waterlily, Semi-Cactus, Laciniated):
I cut these slightly earlier than the full-petaled forms since they open faster.
Best Time to Cut
Early morning or late evening when temperatures are below 75-80°F. This is when sugars are most concentrated in the flowers and stems are fully hydrated.
Have clean buckets ready—clean enough to eat out of. Fill them 1/3 with room-temperature water. I always add floral preservative at this stage; it makes a noticeable difference. Cut stems and drop them straight into the bucket (that little “drop” forces water into hollow stems). Keep buckets out of direct sun.
Conditioning Your Stems
Let stems hydrate for at least 12 hours in a cool place before arranging. If you have a flower cooler (40-44°F), perfect. If not, the coolest spot you have will do—basement, garage, shaded porch. This recovery period is crucial.
Remember: cut stems drink the most water in the first 36 hours. Check water levels regularly once they’re in arrangements.
End of Season: Putting Dahlias to Bed
Your dahlias are ready for dormancy when there’s been a frost (zones 3-8) or they’ve bloomed themselves out and it’s too hot (zones 9-10).
STEP 1: Cut Back
Cut stems down to 2-4 inches above the soil line. Label everything before you forget which is which.
STEP 2: To Dig or Not to Dig?
Zones 9-10: Tubers can stay in the ground and will wake up when it cools off.
Zone 8: You’re on the fence. Well-drained soil, deeper planting, good mulch, and no nibbling critters improve survival odds.
Zones 3-7: Dig them up.
STEP 3: Digging & Storage
Let tubers “cure” in the ground for 2-3 weeks after cutting back—this toughens the skin. Then carefully lift the clumps.
If storing whole clumps: Leave some soil on them to prevent excessive shriveling.
If dividing: Wash, divide immediately, and pack into coarse vermiculite or wood shavings in breathable containers. Don’t cover the crown (top of the clump).
Store between 40-55°F. Check periodically and toss any rotted tubers.
My Two Cents
Dahlias are generous plants. Feed them, stake them, cut from them regularly, and they’ll reward you with buckets of blooms all season long. Don’t overthink it—just get your hands dirty and see what works in your garden.
Happy growing!
– Lana
These tips come from years of growing dahlias on my nano flower farm. Your conditions may vary, but these strategies have served me well.